Redux Library in ReactJS
Redux is a popular state management library for JavaScript applications, especially useful in larger applications where state management can become complex. React Redux provides a set of hooks to work with Redux in React applications, including useDispatch and useSelector. These hooks allow you to interact with the Redux store more conveniently within functional components.
Before moving in, let's understand what can Redux do for us:
Suppose we have a situation like:
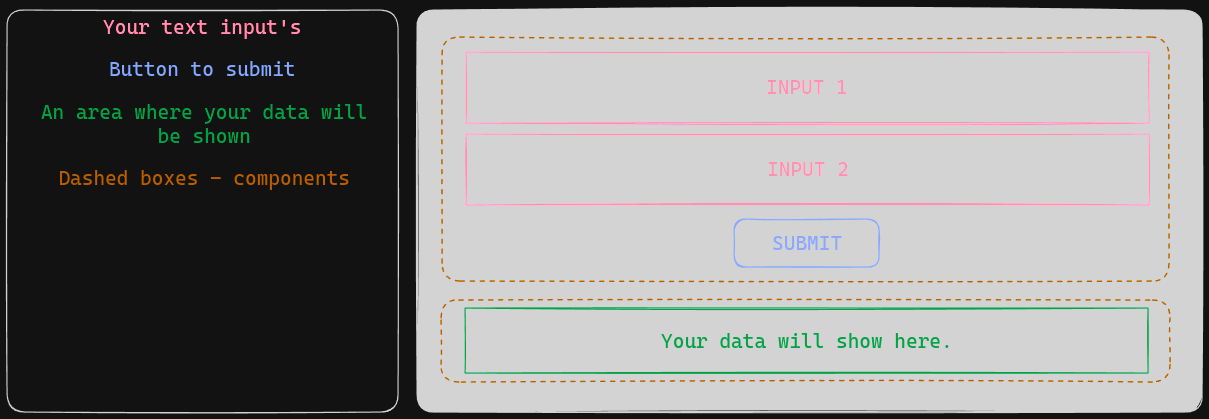
You want to pass the data from one child to another, there can be hard ways to it but Redux makes it easier for us to deal with passing the data. If you wanted to do it without Redux you would have to send the data to parent then the parent would send the data to its parent and so on then be passed to the child you wanted to share it with. But on Redux we have a global store where you save the data to store and then directly access it wherever you desire. Let's see how we setup Redux and how we can use it.
Setting Up Redux with React
- Install Redux and React Redux:
npm install @reduxjs/toolkit react-redux
- Create Redux Slice:
// MessageSlice.js

// Importing createSlice function from redux toolkit.
import { createSlice } from "@reduxjs/toolkit";

// Creating a state for capturing our data.
const messageSlice = createSlice({
    // name of our state.
    name: "messageSlice",

    // Defines what should be the initial state.
    initialState: {
        message: ""
    },

    // Saves the data coming from the payload.
    reducers: {
        setMessage: (state, action) => {
            state.message = action.payload;
        }
        // We can have as many reducers as we want, by following a comma.
        }
    }
});

// Exporting by default
export default messageSlice.reducer;

// Separately exporting our defined reducers.
export const {setMessage, resetMessage} = messageSlice.actions;
- Creating Redux Store:
// Store.js
import { configureStore } from "@reduxjs/toolkit";
// Importing as an alias.
import messageReducer from "./Slices/MessageSlice";

export default configureStore({
    reducer: {
        messageReducer
    }
});
- Provide the Redux Store to React:
// index.js
import React from 'react';
import ReactDOM from 'react-dom/client';
import './index.css';
import App from './App';
import { Provider } from 'react-redux';
import store from './Redux/Store';

const root = ReactDOM.createRoot(document.getElementById('root'));
root.render(
  <React.StrictMode>
                {/* store coming from Store.js */}
    <Provider store={store}>
      <App />
    </Provider>
  </React.StrictMode>
);
Now let's see how we can parse the data using Redux
As we have seen in the diagram above, we wanted to send data from one child to second child, let's see this in action how we can do it.
// Child1.js

import React, { useRef } from 'react';
import { useDispatch } from 'react-redux';
import { setMessage } from '../Redux/Slices/MessageSlice';

function Child1() {

    const inputRef = useRef(null);

    // Assigning to a variable.
    const dispatch = useDispatch();

    function handleSubmit(e) {
        e.preventDefault();

        const inputTextValue = inputRef.current.value;

        // Selecting the store we had created earlier and passing the current data coming from our input.
        dispatch(setMessage(inputTextValue));
    }
  return (
    <div>
        <form onSubmit={handleSubmit}>
            <input type="text" ref={inputRef}/>
            <input type="submit" onClick={handleSubmit} />
        </form>
    </div>
  );
}

export default Child1;
useDispatch()is a Redux function, this functions returns a reference to the dispatch function from the Redux store. You can use this function to dispatch actions.Inside the parenthesis of
useDispatch()you can select the store you have created and want to save it in that store.
// Child2

import React from 'react';
import { useSelector } from 'react-redux';

function Child2() {

    const message = useSelector(state => state.messageReducer.message);

  return (
    <div>The data from child1 is: {message}</div>
  );
}

export default Child2;
The
useSelectorhook allows you to extract data from the Redux store state, using a selector function.messageReduceris basically ourMessageSlice.js, and while importing it into ourStore.jswe changed its name tomessageReducerand used it insideconfiguresStore()function.
With that our Redux setup and usage guide is complete. Now we can create as many components we want and pass the data in places we want to, This was a very basic explanation to make you understand how this library is used. Let's understand this in a bit complex example.
Note List MiniApp
- Creating Slice:
// NoteSlice.js

import { createSlice } from "@reduxjs/toolkit";

const NoteSlice = createSlice({
    name: "NoteSlice",
    initialState: {
        note: []
    },
    reducers: {
        createNote: (state, action) => {
            state.note.push(action.payload);
        },
        deleteNote: (state, action) => {
            state.note = state.note.filter(note => note.id !== action.payload)
        }
    }
});

export default NoteSlice.reducer;

export const {createNote, deleteNote} = NoteSlice.actions;
- Setting up Store:
// Store.js
import { configureStore } from "@reduxjs/toolkit";
import NoteReducer from "./Slices/NoteSlice";

export default configureStore({
    reducer: {
        NoteReducer
    }
});
- Provide the Redux Store to React:
import React from 'react';
import ReactDOM from 'react-dom/client';
import './index.css';
import App from './App';
import { Provider } from 'react-redux';
import Store from './Redux/Store';

const root = ReactDOM.createRoot(document.getElementById('root'));
root.render(
  <React.StrictMode>
    <Provider store={store}>
      <App />
    </Provider>
  </React.StrictMode>
);
- Creating Notes Component:
// Notes.js
import React, { useState } from 'react';
import { useDispatch } from 'react-redux';
import { createNote } from '../Redux/Slices/NoteSlice';
import { nanoid } from '@reduxjs/toolkit';
import ListNotes from './ListNotes';

function Notes() {

    const [title, setTitle] = useState("");
    const [desc, setDesc] = useState("");

    const dispatch = useDispatch();

    const handleSubmit = (e) => {
        e.preventDefault();

        dispatch(createNote({
            title,
            desc,
            id: nanoid(10)
        }));
    };

  return (
    <div>
        <form onSubmit={handleSubmit}>
            <input type="text" placeholder='Title here' onChange={(e) => setTitle(e.target.value)}/>
            <input type="text" placeholder='Description here' onChange={(e) => setDesc(e.target.value)}/>
            <input type="submit" onClick={handleSubmit}/>
        </form>
        <ListNotes/>
    </div>
  );
}

export default Notes;
- Creating Note Lists component:
// ListNotes.js
import React from 'react';
import { useDispatch, useSelector } from 'react-redux';
import { deleteNote } from '../Redux/Slices/NoteSlice';

function ListNotes() {

    const notes = useSelector(state => state.NoteReducer.note);

    const dispatch = useDispatch();

  return (
    <div>
        {notes.map(note => {
            return <div>
                <p>{note.id}</p>
                <h2>{note.title}</h2>
                <p>{note.desc}</p>
                <button onClick={() => dispatch(deleteNote(note.id))}>Delete</button>
            </div>
        })}
    </div>
  );
}

export default ListNotes;
Understanding Redux because this tool is made to make our life easier, as you can see we had not needed to pass the data's from child to parents and then pass it somewhere else. All of the data's were getting stored inside of our Store and letting us to use it wherever we wanted to.